How to Tension Fence Wire
Below is a step-by-step guide on how to tension fence wire using different methods.
WITH HANDS
- Experience Required: Low
- Tools Required: Protective gloves, Cutters
- Materials Required: T posts, Line tensioning wire
- This is the simplest method but provides the least tension.
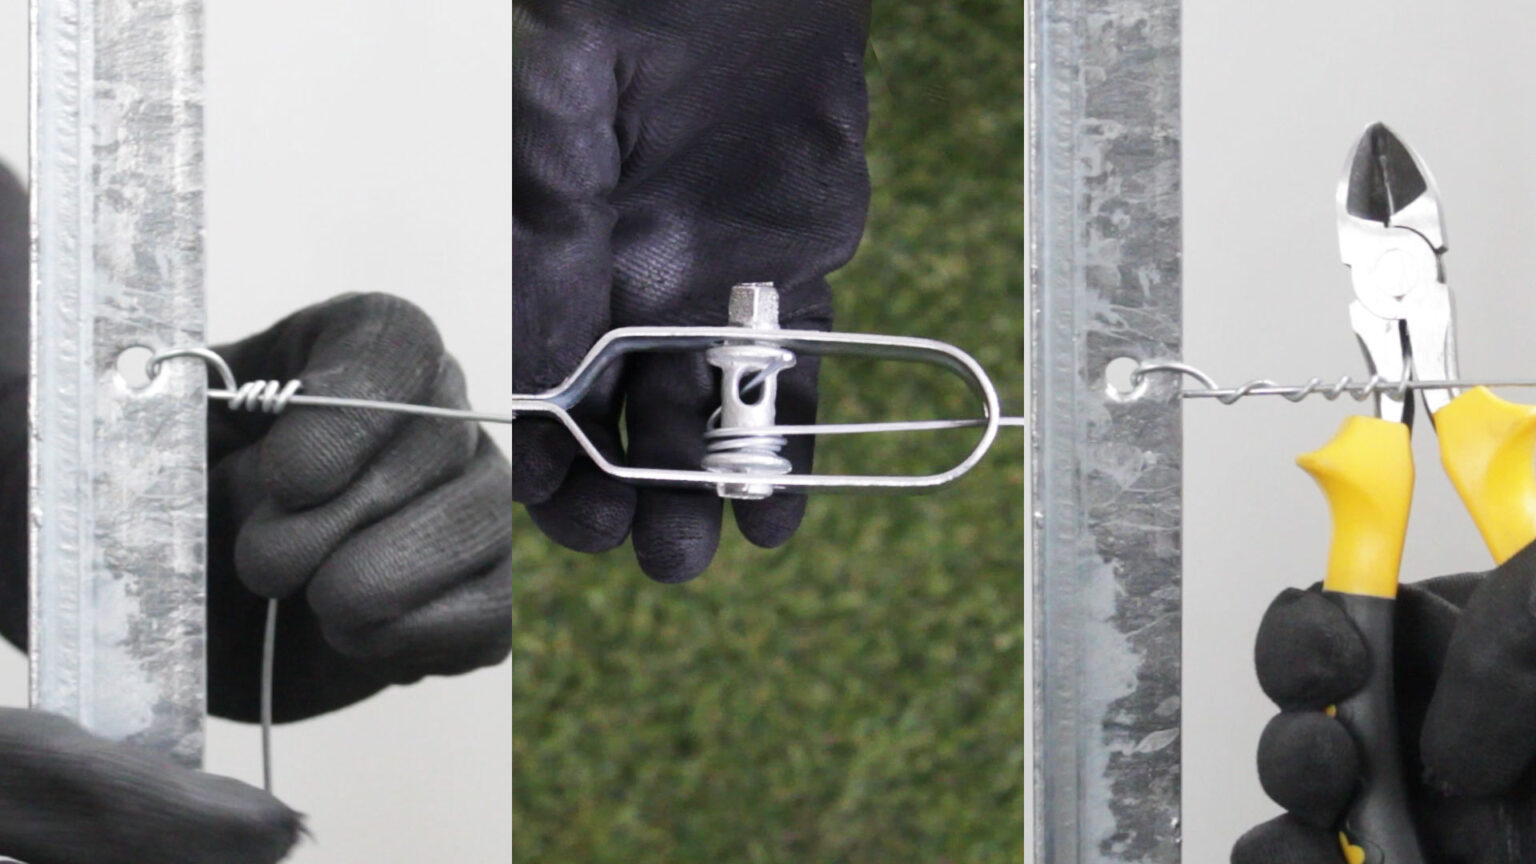
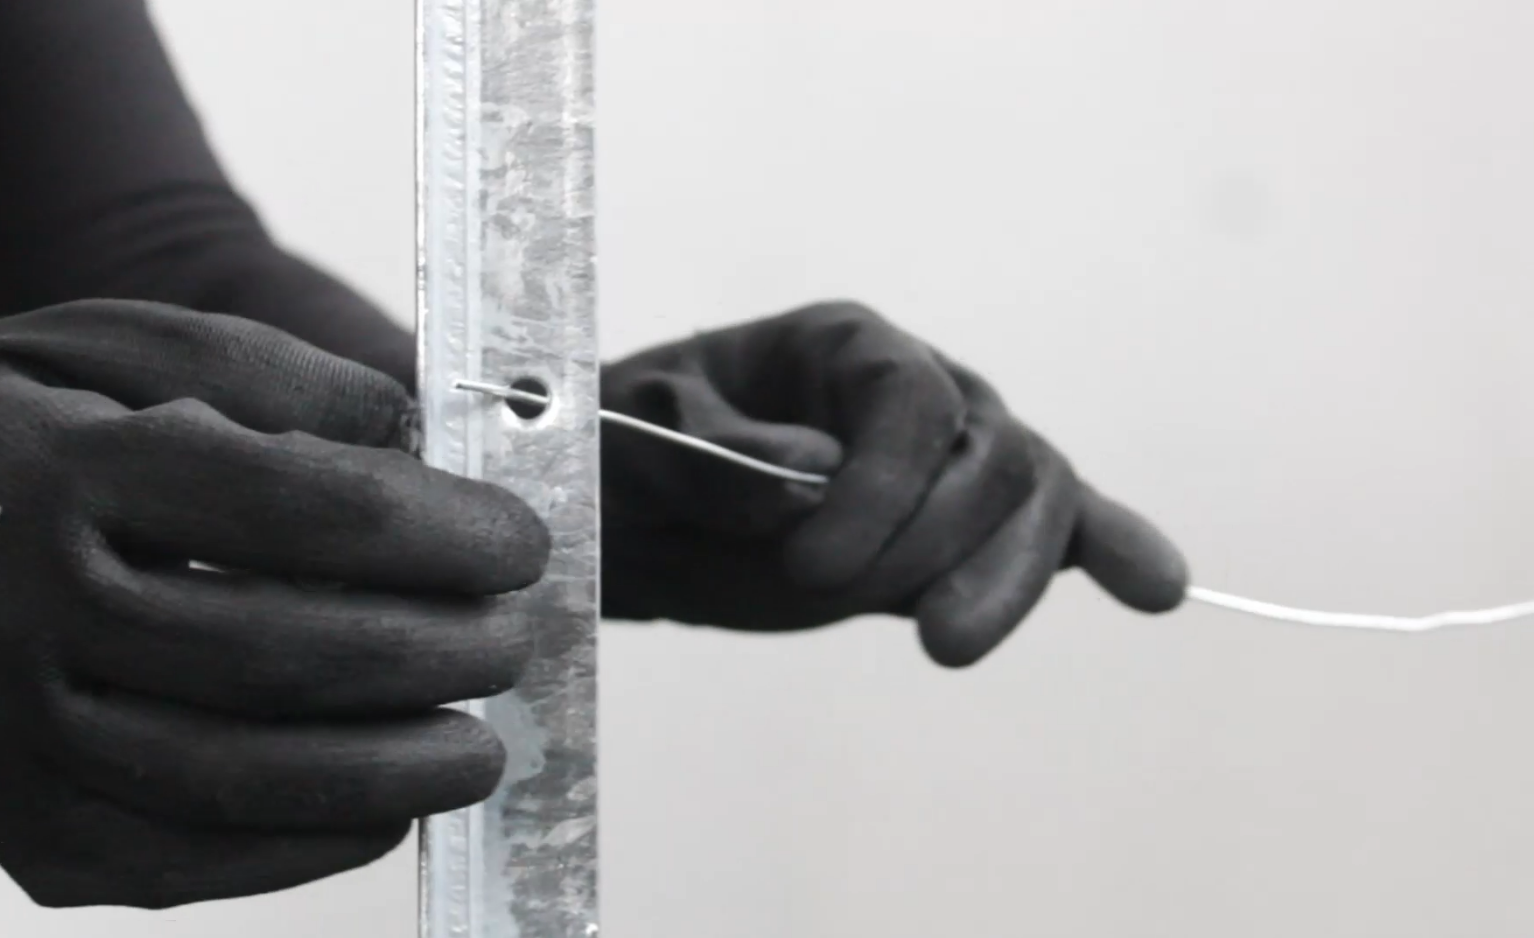
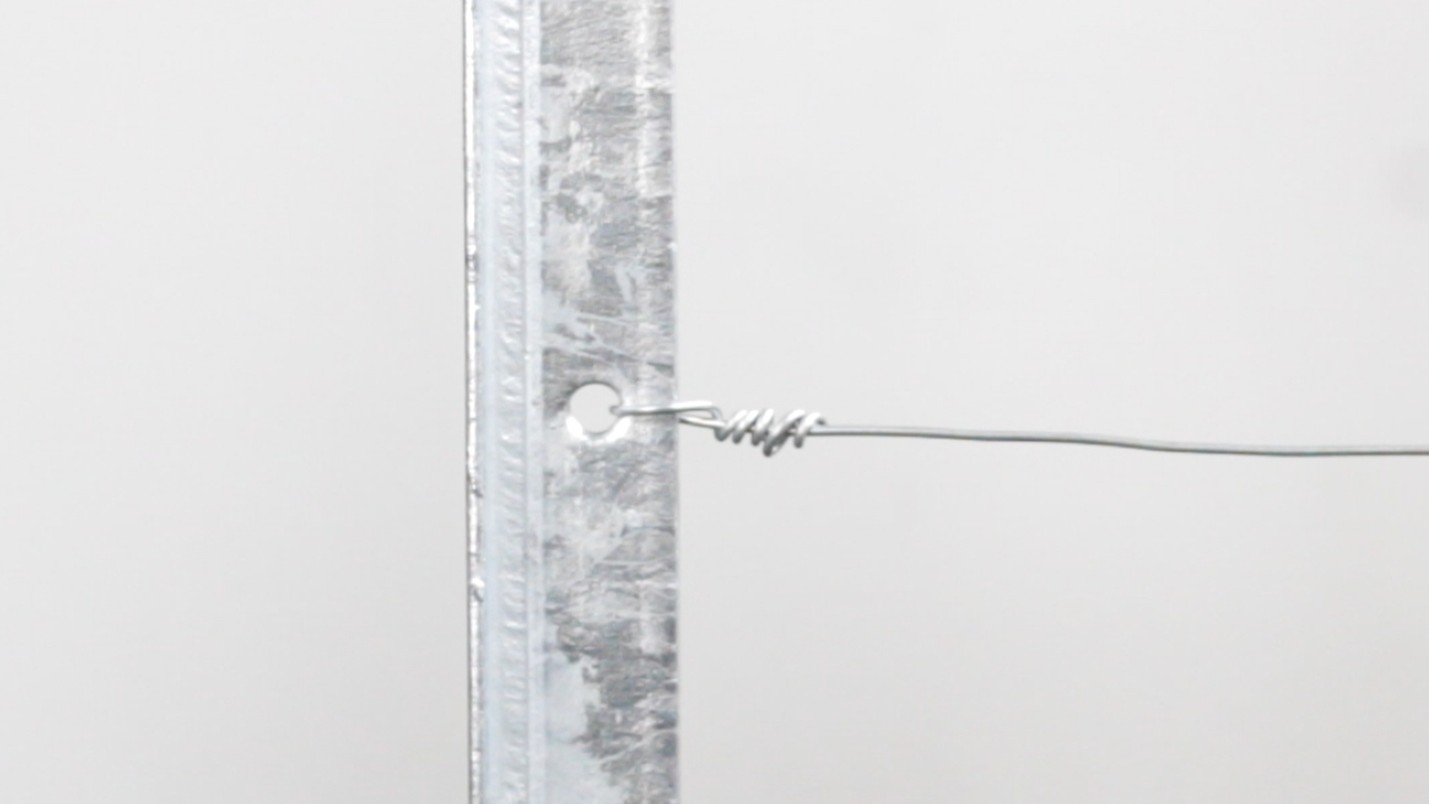
Step 1) Insert Into the Hole
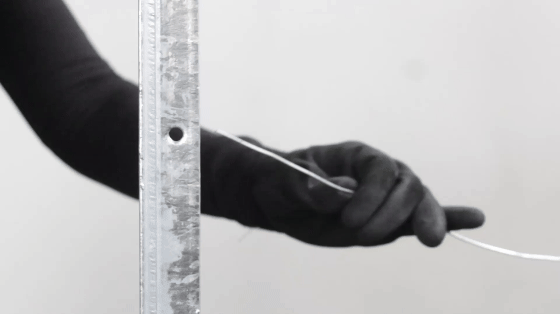
- Begin the process of how to install tension wire by inserting the strand into the pre-drilled hole of the end posts.
- Then, bend the end of the strand at a 90 degree angle to form a handle.
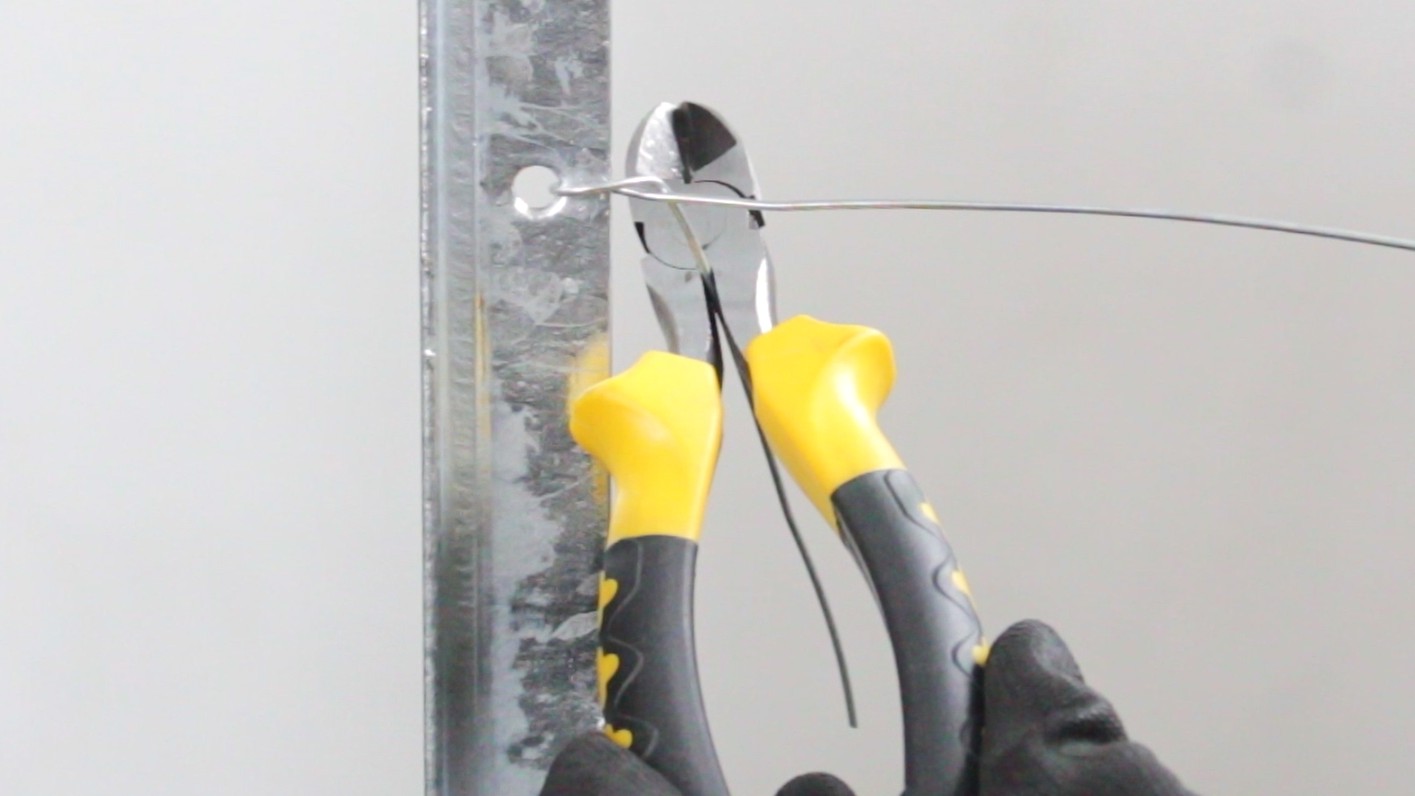
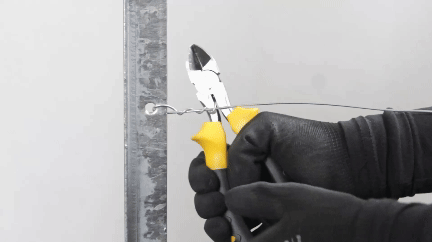
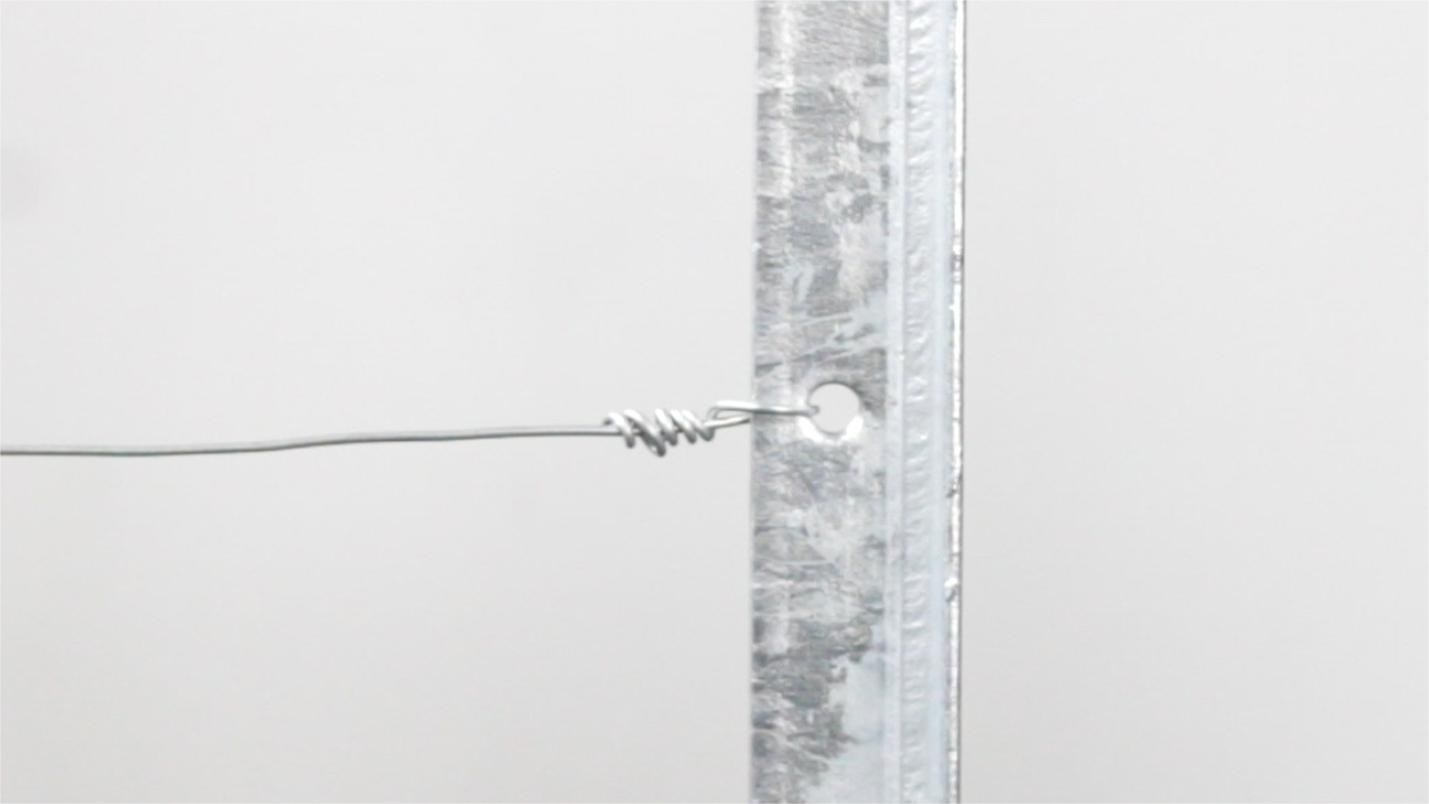
Step 2) Start Twisting
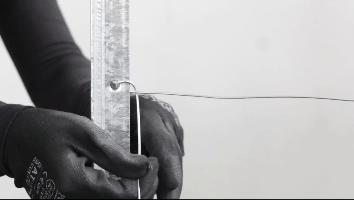
- Hold pressure on the handle and wrap it around the live wire 4-5 times.
- Then, cut off the excess strand.
WITH PLIERS
- Experience Required: Low
- Tools Required: Protective gloves, Pliers (or any twisting tool), Cutters
- Materials Required: T posts, Line tensioning wire
- This method works as a twisting tool, effectively tightening the strand with a simple twisting technique.
Step 1) Insert Line Into Hole
- Insert the line into the pre-drilled hole on the end post and fasten it securely.
Step 2) Insert Wire Between Pliers’ Handles
- Slightly open the pliers to create a gap between the handles.
- Insert the looped end of the strand into the space between them.
- Gently close the pliers so the loop stays in place but can still rotate freely.
Step 3) Twist the Pliers
- Turn the pliers holding the loose ends in one direction.
- Continue twisting until the line is tight.
- Once secure, bend the excess line back and cut it.
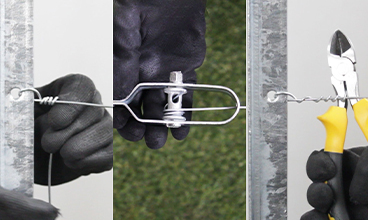
WITH RADISSEUR
- Experience Required: Low
- Tools Required: Protective gloves, Pliers, Wire cutters
- Materials Required: T posts, Line tensioning wire, Radisseur
- This method works as a line strainer, providing excellent tension and is highly recommended.
Step 1) Secure Line to Starting Post
- Attach the line to the post by placing it in the hole, then wrap it around itself 4-5 times to maintain the tightness.
Step 2) Secure Radisseur to Last Post
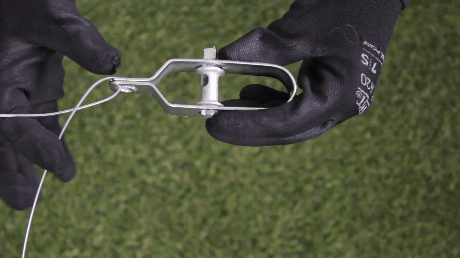
- Attach a radisseur to the last post using a separate piece of line.
Step 3) Thread Line Through the Hole
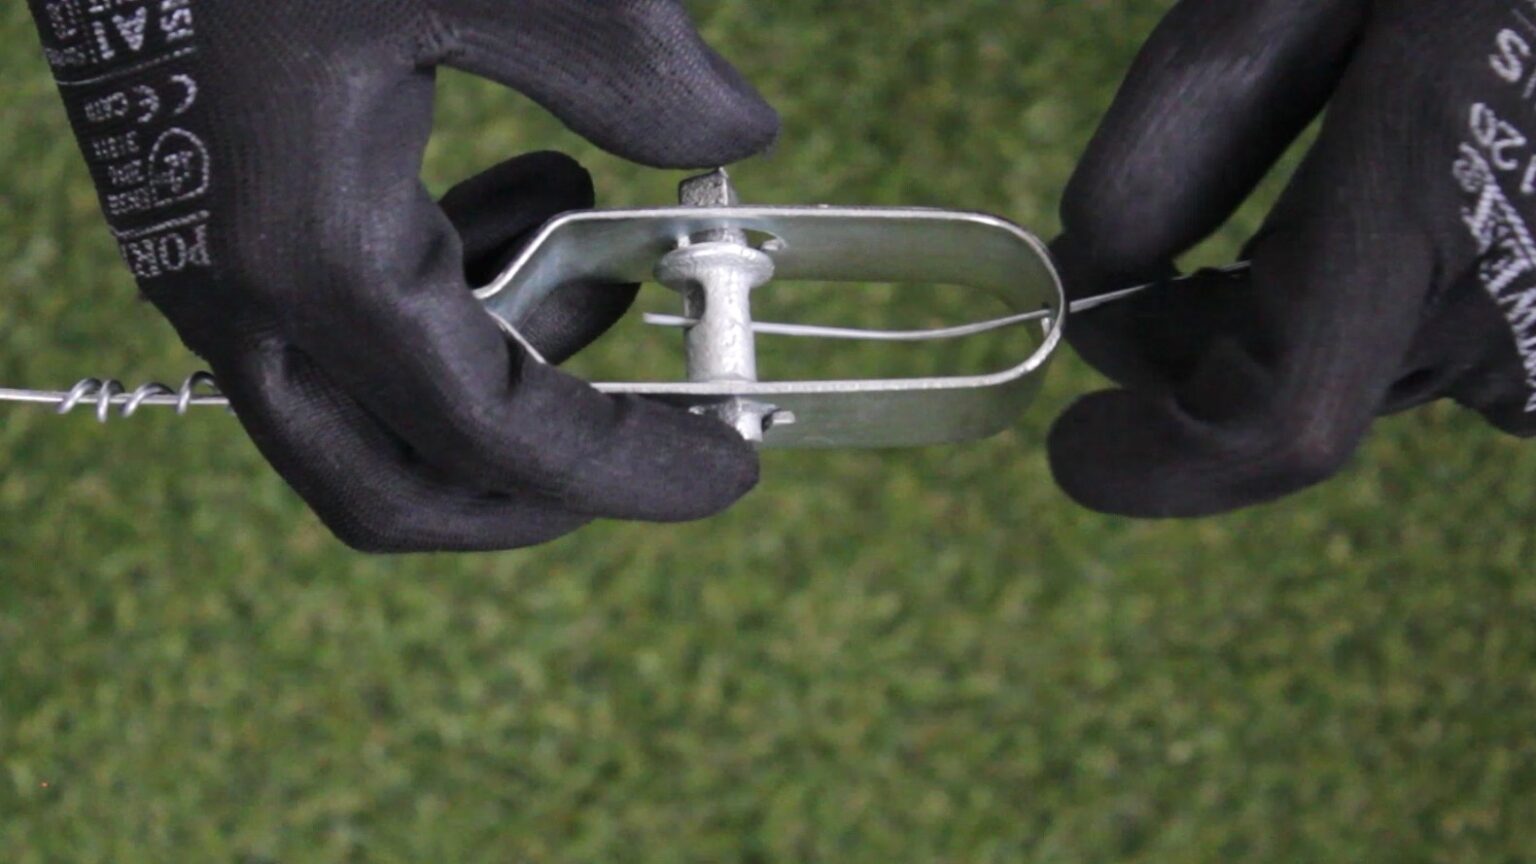
- Thread the line, which was secured to the other end post, through the hole in the center of the radisseur.
Step 4) Tighten the Line
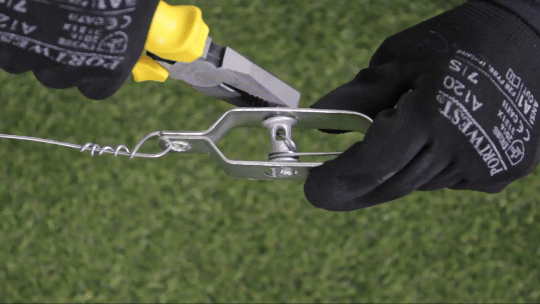
- Use pliers to twist the pin on the radisseur clockwise to tighten the line and finish the process of how to tension fence wire.
WITH TWO NAILS
- Experience Required: Low
- Tools Required: Protective gloves, Cutters
- Materials Required: T posts, Line tensioning wire, 2x nails
- This method is very similar to the one using a radisseur, but it doesn’t require any special materials.
Step 1) Attach Line to Post
- Begin by securing the line to the post, wrapping it around itself 4–5 times.
Step 2) Create a Loop
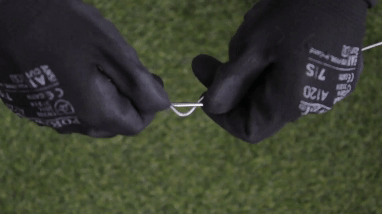
- In the process of how to tension wire without a strainer, simply bend the line slightly and position it in a safe location where it won’t pose a danger.
- Insert a nail and twist it half a turn to form a loop.
Step 3) Tighten the Strand
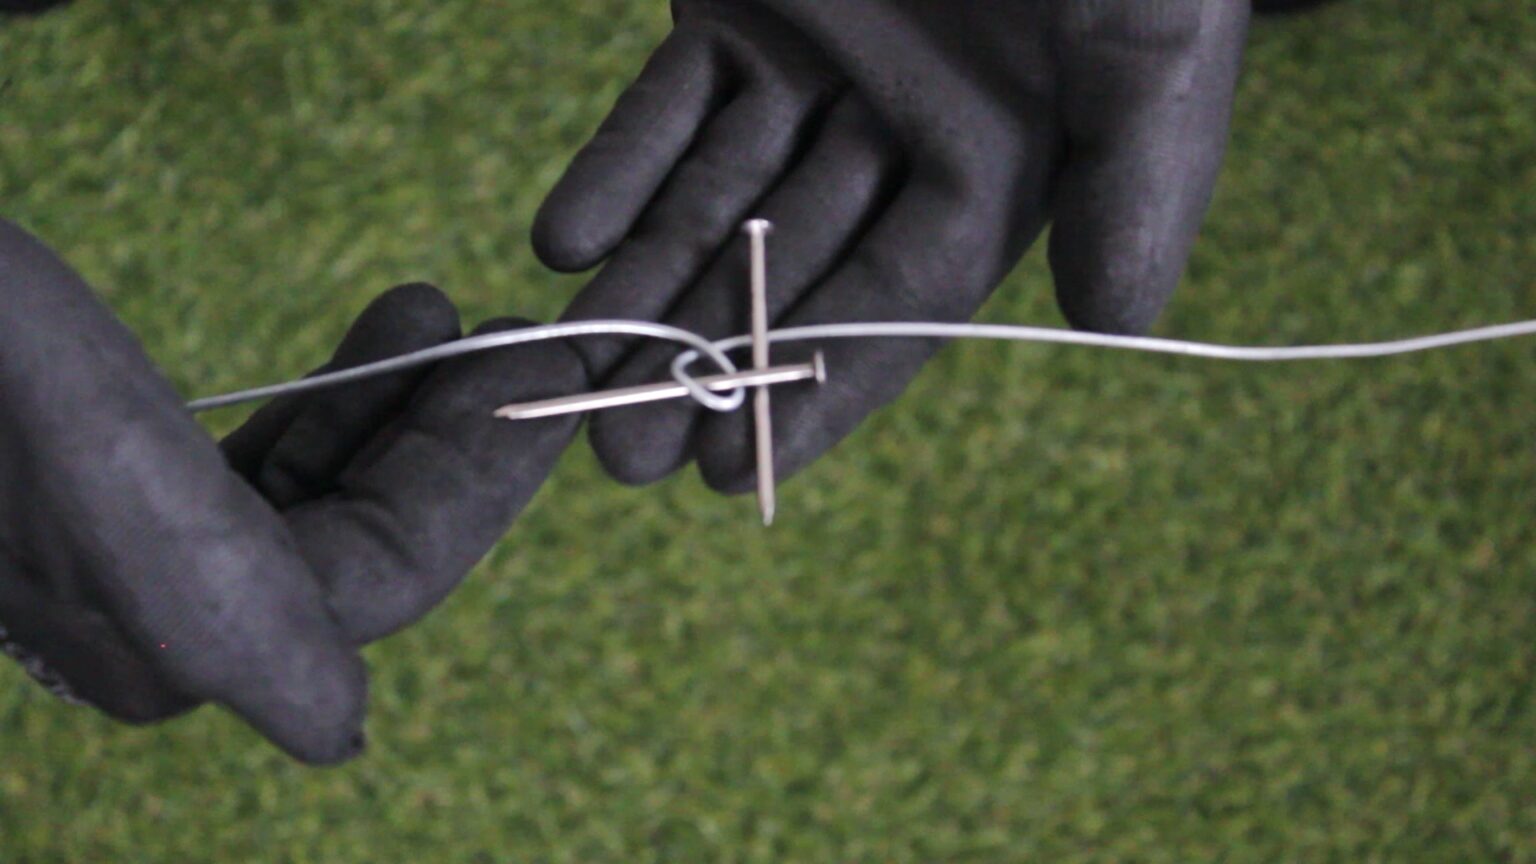
- Place the second nail beneath the loop.
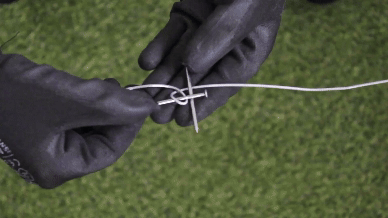
- Hold it firmly, and start tightening the strand.
Step 4) Secure the Nail
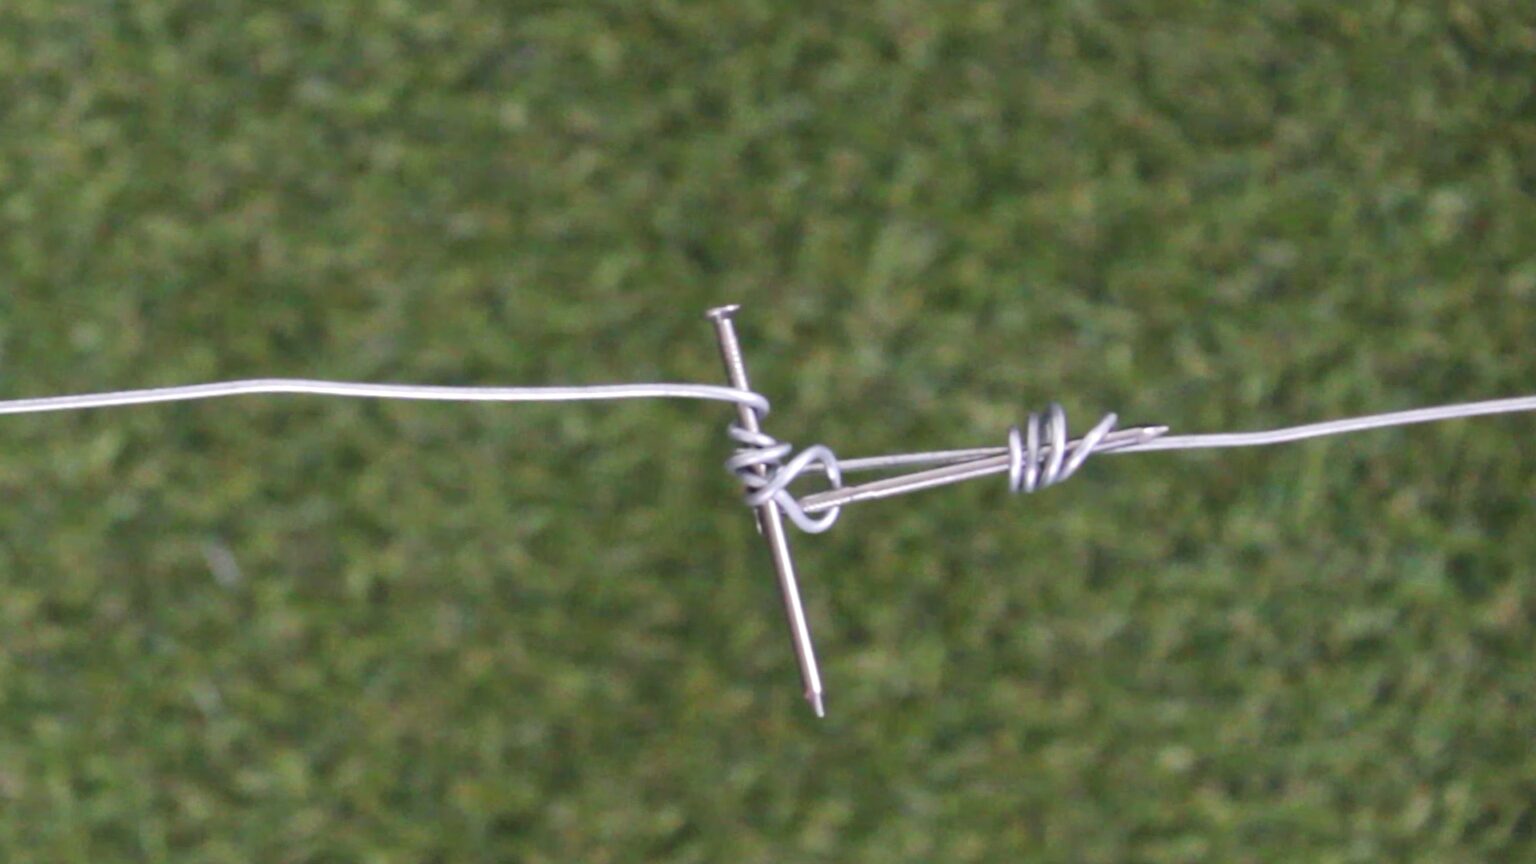
- Secure the nail to the strand using a separate piece of line.
TIPS & TRICKS
- If there are no pre-drilled holes, mark the strand location on the post, then hook or turn the strand around the post two times.
- Avoid over-tightening the line, as excessive tension can cause breakage or damage to the fence posts.
- Regularly check the tightness to ensure optimal performance and adjust as needed.
- Choose high-quality tension lines and tensioners, as durable materials offer better resistance over time.
- Sharp wire ends can cause injuries. Trim any excess line using wire cutters after tightening.
- Consider working with a partner to ensure the strand is properly tightened and securely fastened.
Attaching to Middle Posts
- T Posts or Metal Posts: If the post has pre-drilled holes, thread the line through them. If not, cut small pieces of line and use them to secure the fence wire to each post.
- Wooden Posts: Use fencing staples to attach the strand. Allow a little room for the strand to move inside the staple.
FURTHER READING
- How To Install T Post Fence – A guide showing you how to install t posts in 8 easy steps.
- How to Build a Chicken Wire Garden Fence – Step by step instructions on how to build a chicken mesh garden enclosure.
- How to Install a Wire Mesh Fence – Learn how to install a welded mesh fence.
- Chain Link Fence Installation – A guide showing you how to install a chain link fence.
VIDEO
